

Fellow Windows 8 users, I have discovered an app that makes my PL process so much easier and today I'm going to share a tutorial on how to create 2- 3x4 photos on a 4x6.
Step 1: download the PicsArt app in the Windows Store

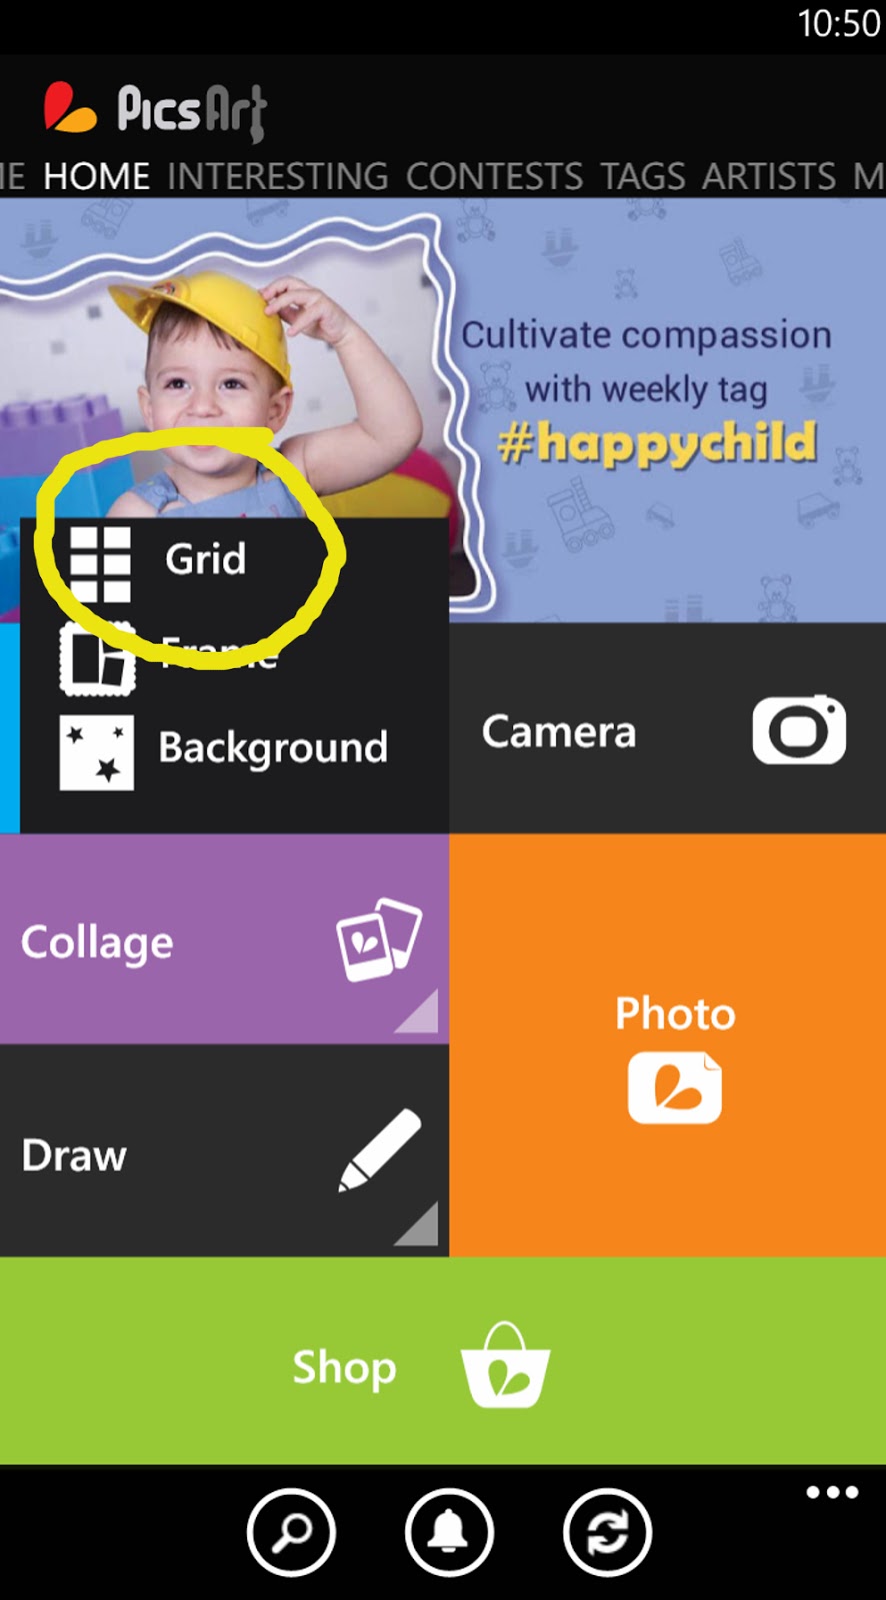
Step 2: open the App and tap the "Collage" button

Step 3: tap the "Grid" option
Step 4: Select "Landscape (4:3)"

Step 5: Select the grid design with only 2 boxes

Step 6:
Here you will see a few tools. The border width is set by default at 20. I set my border to 3 and after the photos were printed and I cut them in half, there was just a small amount to trim. I want these photos to fit inside the 3x4 photo pockets for my project life page protectors. (Next time I may try border 0, I just wasn't sure if it would cut off some of my photo if I did that). If you want a border around your photos by all means set your border width to whatever you like! This is for your project life! Drag the blue dot to make the border width smaller or larger. By tapping on the gray box the settings will go away.

Step 7:
Now tap "add" to select the photos you want. It will take you to your gallery, or other places like your facebook albums.


Step 8:
You're almost done!! Tap the save button! From here, you can edit your collage further by using different effects, or adding text if you want.

That's it folks! Now that you have saved your collage, it is ready to be printed. This will print as a 4x6. I send my photos to CVS to get printed, so when I got them, this is how they turned out. I just cut them down to size and did have to trim slightly to get rid of the border.


This is a collage that I forgot to change the border from the default width of 20 to 3. I had to trim more and the photo was slightly not as wide since I had to cut more off of it. It really wasn't noticeable once I had them in the page protectors.

If you want to make 2 photos that are in a "landscape" setting you can do exactly what we did above and just rotate the photos so that they are on a 90 degree angle. Or you can choose "portrait (3:4)", select the 2nd collage design, and upload your landscape photos this way.


For those of you that have Windows 8 phones, I hope that you were able to learn how to make life a little simpler when it comes to getting ready to print your photos for your Project Life layouts. This app has been very helpful to me, I hope you will find it useful as well! If you have any questions or comments, please feel free to leave a comment below!
- the crafty love girl


